|
|
|
|
Back to: Excel VBA . Got any Excel/VBA Questions? Free Excel Help
Creating Excel Add-ins
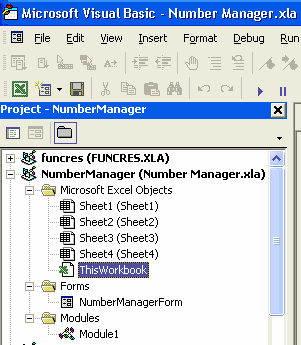
I am often asked by users 'what is the best way to distribute their macros?' My answer, is without doubt via an Excel Add-in. After all, this is what Add-ins are for. For those that are not sure what an Excel add-in is, it's is nothing more than an Excel Workbook that has been saved as an Add-in, File>Save as \ Microsoft Excel Add-in (*.xla). Once saved and re-opened the Workbook will be hidden and can only be seen in the "Project Explorer" via the Visual Basic Editor. It is NOT hidden in the same way as the Personal.xls as this can be seen (and made visible) via Windows>Unhide.
Once completed users can easily install your Add-in like below
- Save a copy to C:\WINDOWS\Application Data\Microsoft\AddIns\ . If not any location, just take note of it for step 4.
- Open any Workbook.
- On the Tools menu, point to Add-Ins and click Browse. Locate your add-in from where you saved it, select it and then click OK.
- Ensure your add-in is in the Add-ins available: box and it is checked.
- Now click OK and the add-in is installed.
Most code can be be saved to an Excel Add-in without too many changes. Some things to be aware of are
- ThisWorkbook will always refer to the Add-in, not the users Workbook. Use ActiveWorkbook instead.
- We cannot refer to sheets in the ActiveWorkbook via CodeNames .
- We should always put toolbars etc back to how the user had them originally. There is nothing worse than an Add-in that changes all your Excel settings without your knowledge.
- Always include some sort of error handling (yes, most add-ins will error at some time).
- Be very aware that the user may have many sorts of Protection on. NEVER use code to uprotect any part of the users Workbook. Simply display a message asking them to unprotect.
- Make full and good use of the Worksheet (sometimes more) you have in the Add-in. I use the Worksheet(s) to store user setting like toolbars etc.
- Holding down the Shift key will NOT prevent any Add-in Workbook events running like it can in a normal .xls
- If you need to see the Add-in Workbook again, eg updates modifications etc. Go into the VBE while the Add-In is installed and from the Properties Window select the IsAddin property and set it to False. Saving the Workbook as an Add-in sets this Property to True.
- Apply protection to the Modules of you Add-in, via Tools>VBAProject Properties-Protection.
Ok, once you have created your Add-in you will need to make the macros within it easy for the user to run. This is best achieved by making full use of both the Workbook_AddinInstall and the Workbook_AddinUnInstall Events in the Private Module of the ThisWorkbook Object. Simply double click on ThisWorkbook for the *.xla file and Excel will take you into the Private Module where the code is placed.
Let's look at a simple example of this.
Option Explicit

Dim cControl As CommandBarButton


Private Sub Workbook_AddinInstall()


On Error Resume Next 'Just in case

	'Delete any existing menu item that may have been left.

	Application.CommandBars("Worksheet Menu Bar").Controls("Super Code").Delete

	'Add the new menu item and Set a CommandBarButton Variable to it

	Set cControl = Application.CommandBars("Worksheet Menu Bar").Controls.Add

	'Work with the Variable

		With cControl

			.Caption = "Super Code"

			.Style = msoButtonCaption

			.OnAction = "MyGreatMacro"

			'Macro stored in a Standard Module

		End With


	On Error GoTo 0


End Sub
Private Sub Workbook_AddinUninstall()


On Error Resume Next 'In case it has already gone.

	Application.CommandBars("Worksheet Menu Bar").Controls("Super Code").Delete

	On Error GoTo 0

End Sub
This code will be all you need to add a single menu item (called Super Code) to the end of the existing Worksheet Menu Bar as soon as the Add-in is installed by the user via Tools>Add-ins. When the Super Code menu item is clicked a macro (that is within a standard module of the add-in) is run. As mentioned earlier, the above code MUST be placed in the Private Module of ThisWorkbook for the Add-in.
If you want the Super Code menu item added, say before the Format menu item, you could use some code like this.
Option Explicit

Dim cControl As CommandBarButton


Private Sub Workbook_AddinInstall()

Dim iContIndex As Integer


	On Error Resume Next 'Just in case

	'Delete any existing menu item that may have been left

	Application.CommandBars("Worksheet Menu Bar").Controls("SuperCode").Delete


	'Pass the Index of the "Format" menu item number to a Variable.

	'Use the FindControl Method to find it's Index number. ID number _

	 is used in case of Customization

	iContIndex = Application.CommandBars.FindControl(ID:=30006).Index


	'Add the new menu item and Set a CommandBarButton Variable to it.

	'Use the number passed to our Integer Variable to position it.

	Set cControl = Application.CommandBars("Worksheet Menu Bar").Controls.Add(Before:=iContIndex)


	'Work with the Variable

		With cControl

			.Caption = "Super Code"

			.Style = msoButtonCaption

			.OnAction = "MyGreatMacro"

			'Macro stored in a Standard Module

		End With

	On Error GoTo 0

End Sub
There would be no need to change the Workbook_AddinUninstall() code in this case.
We have covered ID numbers while working with CommandBars etc in a P rior Newsletter Issue The link to the Microsoft site that has a BIG list of all the ID numbers for working with CommandBars can be Found Here
The above examples actually have the all the menu item code in the Workbook_AddinInstall and Workbook_AddinUnInstall Not a problem when the code is only adding one menu item. If however, you will be adding more then one and perhaps even Sub menus, you should place it in a Procedure (or 2) inside a standard Module. Then use some code as shown below
Private Sub Workbook_AddinInstall()

Run "AddMenus"


End Sub


Private Sub Workbook_AddinUninstall()

Run "DeleteMenu"

End Sub
Then in the standard module put some code perhaps like this
Sub AddMenus()

Dim cMenu1 As CommandBarControl

Dim cbMainMenuBar As CommandBar

Dim iHelpMenu As Integer

Dim cbcCutomMenu As CommandBarControl


	'(1)Delete any existing one.We must use On Error Resume next _

		in case it does not exist.

	On Error Resume Next

	Application.CommandBars("Worksheet Menu Bar").Controls("&NewMenu").Delete


	'(2)Set a CommandBar variable to Worksheet menu bar

	Set cbMainMenuBar = Application.CommandBars("Worksheet Menu Bar")


	'(3)Return the Index number of the Help menu. We can then use _

		this to place a custom menu before.

	iHelpMenu = cbMainMenuBar.Controls("Help").Index


	'(4)Add a Control to the "Worksheet Menu Bar" before Help

	'Set a CommandBarControl variable to it

	Set cbcCutomMenu = cbMainMenuBar.Controls.Add(Type:=msoControlPopup, Before:=iHelpMenu)


	'(5)Give the control a caption

	cbcCutomMenu.Caption = "&New Menu"


	'(6)Working with our new Control, add a sub control and _

		give it a Caption and tell it which macro to run (OnAction).

			With cbcCutomMenu.Controls.Add(Type:=msoControlButton)

				.Caption = "Menu 1"

				.OnAction = "MyMacro1"

			End With

	'(6a)Add another sub control give it a Caption _

		and tell it which macro to run (OnAction)

			With cbcCutomMenu.Controls.Add(Type:=msoControlButton)

				.Caption = "Menu 2"

				.OnAction = "MyMacro2"

			End With


'Repeat step "6a" for each menu item you want to add.


	'Add another menu that will lead off to another menu

	'Set a CommandBarControl variable to it

		Set cbcCutomMenu = cbcCutomMenu.Controls.Add(Type:=msoControlPopup)

	' Give the control a caption

		cbcCutomMenu.Caption = "Next Menu"


	'Add a control to the sub menu, just created above

		With cbcCutomMenu.Controls.Add(Type:=msoControlButton)

			.Caption = "&Charts"

			.FaceId = 420


.OnAction = "MyMacro2"


End With


On Error GoTo 0


End Sub


Sub DeleteMenu()


On Error Resume Next


Application.CommandBars("Worksheet Menu Bar").Controls("&NewMenu").Delete

	On Error GoTo 0


End Sub
You can read some similar, less detailed, text on Excel add-ins on the Microsoft Developer Network here
Excel Dashboard Reports & Excel Dashboard Charts 50% Off Become an ExcelUser Affiliate & Earn Money
Special! Free Choice of Complete Excel Training Course OR Excel Add-ins Collection on all purchases totaling over $64.00. ALL purchases totaling over $150.00 gets you BOTH! Purchases MUST be made via this site. Send payment proof to [email protected] 31 days after purchase date.
Instant Download and Money Back Guarantee on Most Software
Excel Trader Package Technical Analysis in Excel With $139.00 of FREE software!
Microsoft � and Microsoft Excel � are registered trademarks of Microsoft Corporation. OzGrid is in no way associated with Microsoft
Some of our more popular products are below...
Convert Excel Spreadsheets To Webpages | Trading In Excel | Construction Estimators | Finance Templates & Add-ins Bundle | Code-VBA | Smart-VBA | Print-VBA | Excel Data Manipulation & Analysis | Convert MS Office Applications To...... | Analyzer Excel | Downloader Excel
| MSSQL Migration
Toolkit |
Monte Carlo Add-in |
Excel
Costing Templates